CRT TV Distorted Picture? Ultimate Troubleshooting Guide for Quick Fixes!
Fix blurry, warped, or flickering CRT TV displays with our easy step-by-step guide.
🧾 Introduction
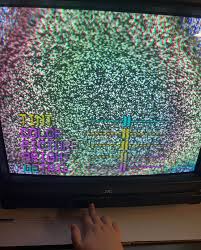
A CRT TV distorted picture can be frustrating, but it doesn’t always mean your television is beyond repair. In this guide, we’ll walk you through troubleshooting steps to fix CRT TV distorted picture issues effectively. Whether you’re facing color blotches, warping, or blurry images, these solutions will help restore your TV’s display quality.
🔍 Common Causes of CRT TV Distortion
A CRT TV distorted picture may occur due to several reasons, including:
- Magnetic interference from nearby electronic devices.
- Faulty degaussing circuit, causing color distortion.
- Damaged yoke coil affecting image alignment.
- Defective horizontal or vertical circuits, leading to screen warping.
- Aging picture tube, reducing overall display clarity.
- High voltage issues, which can affect image focus and stability.
- Loose or faulty connectors, causing flickering or shifting images.
Understanding these causes will help in effectively diagnosing and fixing your CRT TV distorted picture.
🧪 Recommended Tool: Digital Multimeter
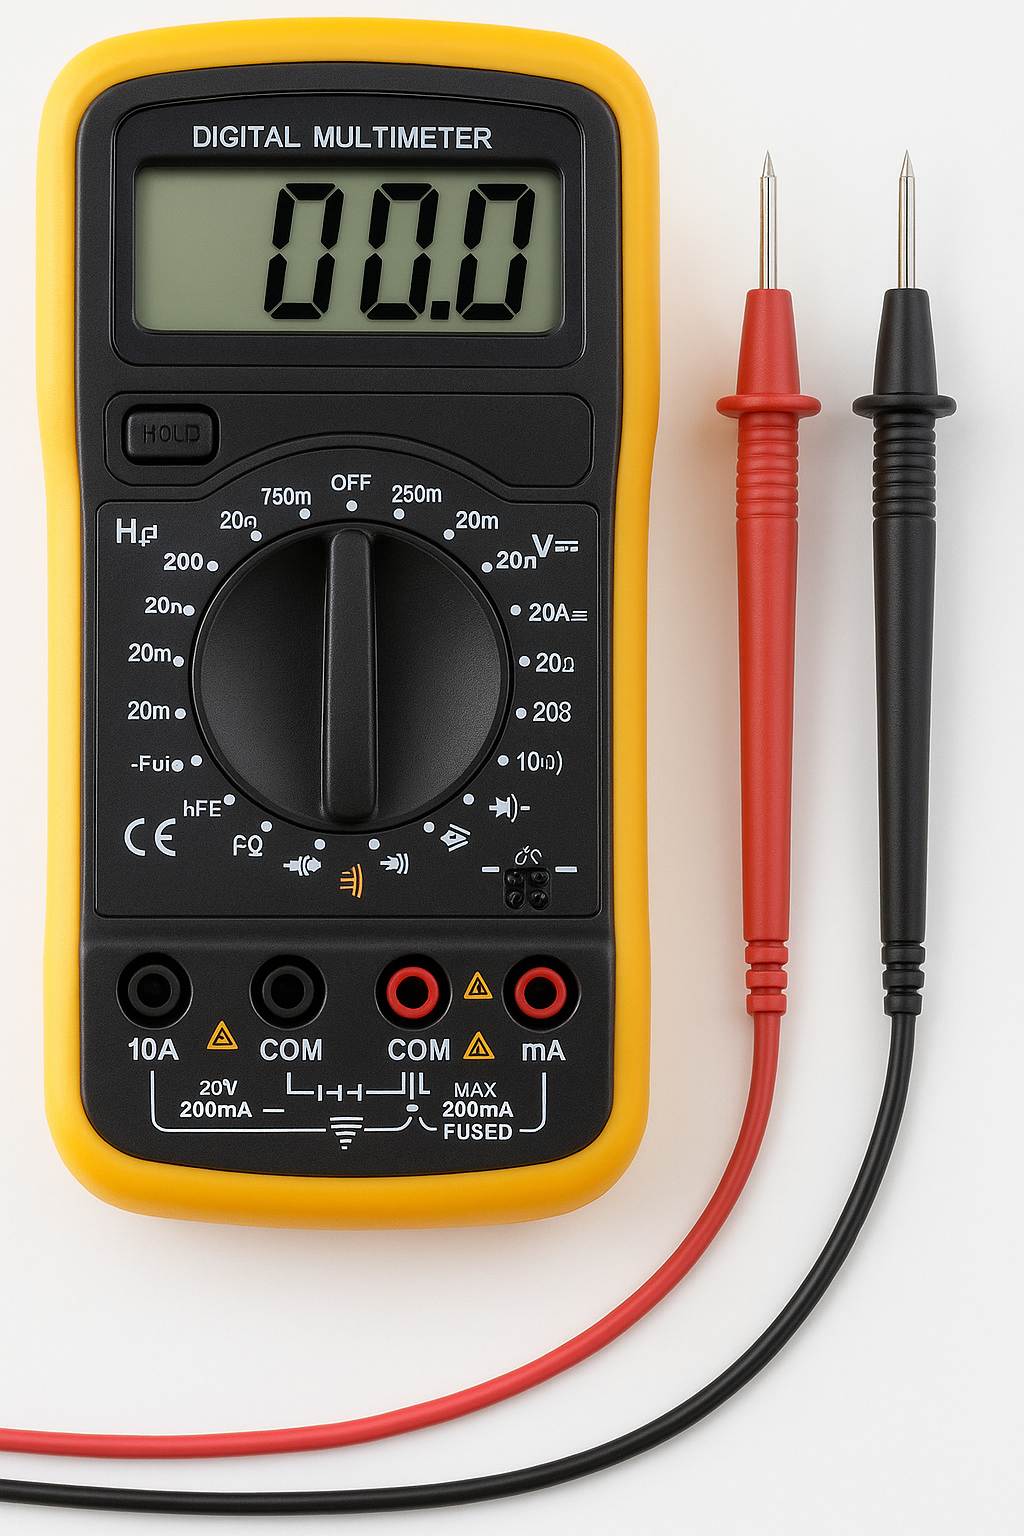
This digital multimeter is perfect for checking continuity, voltage, resistance, and component health during CRT TV repair. A must-have tool for safe and accurate troubleshooting.
- ✔️ Measures AC/DC voltage and current
- ✔️ Tests resistance, diodes, continuity
- ✔️ Handy for checking yoke coils, flyback transformers, and PTC resistors
🛠️ Step-by-Step Troubleshooting Guide
1. Check for Magnetic Interference
Electromagnetic fields from nearby electronic or magnetic sources can interfere with the CRT’s electron beam path, causing color blotches, rainbow patches, or shifting images. CRT TVs are especially sensitive to magnetic interference due to their analog deflection system. Here’s how to identify and fix it:
- Remove or relocate any magnetic objects like speakers, mobile phones, electric fans, or power adapters placed near the TV.
- Ensure your TV is not placed near a refrigerator, microwave oven, subwoofer, or transformer which may cause distortion.
- If your CRT has a built-in degaussing function, turn the TV off for a few minutes and then power it back on to allow auto-degaussing to activate.
- If the issue persists, perform manual degaussing using an external degaussing coil or wand.
- Move the degaussing coil in slow circular motions from the center outward for 10–15 seconds, then gradually pull away.
- Repeat the process if any residual color blotches or shadowing remain.
- Avoid placing unshielded or non-magnetically isolated speakers near the TV, especially on top or sides of the CRT case.
- Ensure the CRT TV is located at least 1 meter away from high-current AC mains or stabilizers.
2. Verify Degaussing Circuit Functionality
CRT TVs use an automatic degaussing circuit that activates momentarily when the TV is powered on. This circuit eliminates residual magnetism that may cause color blotches, rainbow effects, or discolored corners. If these symptoms persist, the degaussing circuit may not be working correctly.
- Unplug the TV for at least 30 minutes to reset the degaussing thermistor and allow it to cool.
- Turn the TV back on and check if the color distortion disappears after startup.
- Inspect the degaussing coil (loop of thick wire around the CRT screen) for continuity using a multimeter.
- Check components like the thermistor (usually an NTC or PTC resistor), relay, and thermal fuse for damage or failure.
- Look for signs of overheating or burnt areas near the degaussing section on the PCB.
- If the degaussing coil or PTC resistor is faulty, replace them with parts matching the same ratings.
- If automatic degaussing fails, use an external manual degaussing coil to demagnetize the screen in a circular motion.
- Avoid placing permanent magnets or unshielded speakers near the screen during use.
3. Inspect the Yoke Coil
A misaligned or damaged yoke coil can lead to a CRT TV distorted picture with warping, misalignment, or inconsistent image sizes. It plays a crucial role in controlling electron beam deflection. Here’s how to inspect and handle it:
- Open the back panel carefully after unplugging the TV and letting it discharge.
- Look for loose yoke coil connections or any signs of overheating or burns.
- Check for melted insulation or cracked coil casing around the yoke.
- Ensure the yoke coil is firmly secured to the neck of the CRT tube.
- Adjust the coil slightly if the picture appears rotated or skewed.
- Look for broken winding wires or dry solder joints on the deflection PCB.
- Use a multimeter to test continuity through the yoke coil windings.
- Clean dust or carbon buildup around the coil area that may cause arcing.
- If burnt smell or visible coil damage is found, consider yoke coil replacement.
4. Examine the Horizontal and Vertical Circuits
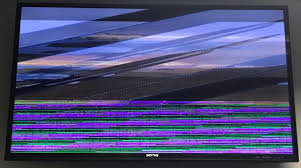
Defects in horizontal or vertical circuits can cause a CRT TV distorted picture, such as:
- Horizontal distortion: Lines stretching or misalignment.
- Vertical collapse: The picture appearing as a single horizontal line.
Possible fixes:
- Check horizontal output transistor and flyback transformer.
- Inspect capacitors/resistors in vertical circuit.
- Reflow dry solder joints and replace faulty parts.
- If vertical collapse occurs, look for dry solder joints and reflow them.
5. Assess the Picture Tube
If your CRT TV distorted picture is caused by an aging picture tube, symptoms may include:
- Weak brightness or contrast.
- Blurry images even after focus adjustments.
- Static or ghosting effects.
Potential solutions:
- Adjust the focus control on the flyback transformer.
- If the tube is significantly degraded, consider a replacement.
- If the cathode ray tube (CRT) is weak, a rejuvenator tool might help temporarily restore it.
6. Check for High Voltage Issues
If the high voltage circuit is malfunctioning, it can contribute to a CRT TV distorted picture, leading to:
- Flickering or unstable images.
- Excessive brightness or screen blooming.
- Unusual noises from the flyback transformer.
Potential solutions:
- Check the flyback transformer for cracks or burns.
- Ensure the high voltage regulator circuit is functioning properly.
- Replace faulty capacitors or diodes in the power supply.
7. Inspect Connectors and Cables
Loose or damaged connections can lead to a CRT TV distorted picture, causing:
- Sudden screen flickering.
- Intermittent picture loss.
- Color distortion due to weak signals.
Steps to fix:
- Securely plug in all cables, including the video input.
- Clean corroded connectors with electronic contact cleaner.
- Replace damaged cables if necessary.
🧰 Preventive Maintenance Tips
To prevent a CRT TV distorted picture and extend the life of your CRT TV:
- Keep the TV away from strong magnetic fields.
- Clean ventilation areas regularly to prevent overheating.
- Use a surge protector to safeguard against voltage fluctuations.
- Avoid placing heavy objects on the TV, as they can cause internal damage over time.
- Periodically check for dry solder joints and reflow if needed.
💡 Final Thoughts
A CRT TV distorted picture doesn’t always mean it’s time for a replacement. By following these troubleshooting steps, you can identify and fix many common CRT TV distorted picture issues. However, if the issue persists despite these efforts, consulting a professional technician may be the best option.
If this guide helped you fix your CRT TV distorted picture, let us know in the comments! For more electronics repair tips, check out our other guides on CRT TV No Display? Fix It Now! and CRT TV Power Issues Troubleshooting.
📚 Related Guides
🎥 Watch Video Tutorial
If you prefer video format, click here to watch the CRT TV repair video.

Pingback: Common CRT TV Power Supply Issues & Fixes – 5 QUICK Guide